
To write a construction estimate, visit the job and write down the exact scope, break the work into line items, price the materials and labor for each one, add your overhead and profit, then state what's excluded and how long the price is good for. Send it as a clear document with your business details, and follow up. The goal is a number you can build for and a page the customer can understand without calling you.
Most estimates that lose money or lose the job go wrong in the same few places: a vague scope, labor priced at wage only, no line for overhead, or a list of what's included with nothing about what isn't. This guide walks through each step in order, with a small worked example at the end.
Step 1: Pin down the scope before you price anything
Walk the job with the customer and write the scope in plain sentences. What gets removed, what gets installed, who picks the finishes, and what stays. Take photos and measurements while you're there, because a number you guessed in the driveway is the one you'll end up paying for.
Check the conditions that change the price: access, parking, stairs, where debris will go, the age of the building, and whether a permit is needed. Decide who pulls the permit and put it in writing. California's contractor board says a contract should spell out who gets the necessary building permits, and that's a sensible habit anywhere.
Ask when the house was built. Under EPA's Lead Renovation, Repair and Painting rule, anyone paid for work that disturbs paint in housing built before 1978 generally must be certified. If the rule applies, the training, setup and cleanup it calls for belong in your price from the start.
Step 2: Break the job into line items
List the work in the order you'd build it: demolition, rough work, finishes, cleanup. Give each line a description, a quantity, a unit (square foot, linear foot, each, or job) and separate material and labor amounts. Separating the two makes your numbers easier to check, and easier to revise when the customer changes their mind.
Write each line specifically enough that nobody can read it two ways. California's board gives a good model for contracts: "install oak kitchen cabinets" with the maker and model, not just "install kitchen cabinets." Those details are what your customer will use if they compare your bid line by line against someone else's.
Step 3: Price the materials
Do your takeoff, meaning a measured count of everything the job needs, from the plans or your field notes. Then price it from current supplier quotes, not last year's memory. Add a waste factor for materials that get cut, such as tile, flooring and trim; your own past jobs are the best guide to how much. Don't forget the small items that add up: fasteners, adhesive, delivery, dumpster fees and disposal.
If the customer hasn't chosen a finish yet, use an allowance: a set dollar amount for that item, reconciled later when they pick. Label it as an allowance on the estimate and make it realistic for what they've said they want. A low allowance wins the job and starts an argument. Here's how allowances work from the homeowner's side.
Step 4: Price the labor at what it really costs you
Estimate hours per line, ideally from time records on similar jobs, then multiply by your real cost per hour. That cost is more than the wage. It should include payroll taxes, workers' compensation, and any benefits you pay, plus the time your crew spends on setup, travel and cleanup that doesn't show up as finished work.
For subcontracted work, get a written quote and use it as the line item. Confirm exactly what the sub's price includes, so a gap between two trades doesn't land on you.
Step 5: Add overhead and profit, and know markup from margin
Overhead is what it costs to stay in business: insurance, licenses, vehicles, tools, software, office time and your own unpaid hours spent writing estimates. Profit is what's left after that. Both have to be in the price, as separate decisions. A simple way to set overhead is to divide your yearly overhead costs by your yearly job costs, using your own books.
Markup and margin are not the same thing, and mixing them up quietly shrinks your profit. Markup is a percentage of your cost. Margin is a percentage of the selling price. A 20% markup on a $1,000 cost gives a $1,200 price, and that $200 is only about 16.7% of the price. To get a true 20% margin on the same job, divide the cost by 0.80, which gives a $1,250 price.
Step 6: Say what's excluded and how long the price holds
Exclusions protect you and your customer equally. List what's not in the price: for example, permit fees if the owner pays them, repairs to anything hidden behind walls, painting after the patch, or moving furniture. Add how unknown conditions will be handled, normally a written change order before the extra work starts.
Put an expiration date on the estimate, since material prices move and your schedule fills up. Thirty days is a common choice, but pick what fits your market. Also say plainly whether this is an estimate that could change or a fixed bid. What your wording commits you to depends on your state's law, so ask an attorney or your licensing board if you're not sure.
Step 7: Include your terms and send it
A complete estimate has your business name, address, phone and license number; the customer's name and job address; the date and the expiration date; the scope and line items; allowances and exclusions; the proposed schedule; the payment terms and the total.
Check your state's rules before you set a deposit. In California, the board says a home improvement down payment should never exceed 10 percent of the contract price or $1,000, whichever is less, and home improvement jobs over $500 need a written contract. Other states set their own rules, so look up your licensing board's.
Send it soon after the visit, while the job is fresh for the customer. Then follow up once or twice. Your estimate may be one of several they're weighing, and a short check-in shows how you'd communicate on the job.
A worked example
Here's a small bathroom estimate. All of these prices are made-up examples to show the layout and the math, not real costs for your market.
Demolition and haul-off: 1 job, $150 material, $900 labor, line total $1,050.
Floor tile, installed: 60 square feet at $6 material and $9 labor per square foot, line total $900.
Vanity and faucet allowance: 1 allowance, $1,200 material, $300 labor, line total $1,500.
That's $3,450 in job costs. With a 20% markup for overhead and profit ($690), the example total is $4,140. If this contractor wanted a true 20% margin instead, the price would be $3,450 divided by 0.80, or $4,312.50. The $172.50 gap is what a mix-up between markup and margin would cost on this one small job.
Common mistakes to avoid
Copying a price from a past job without checking today's supplier costs. Pricing labor at the hourly wage. Leaving out overhead because the job feels small. Writing "bathroom remodel, $4,140" with no detail, which gives the customer nothing to trust. And skipping the follow-up, which leaves all that work sitting in an inbox.
After each job, compare your estimated hours and materials with what actually happened. Those notes are what make your next estimate more accurate.
Build your estimates in one place
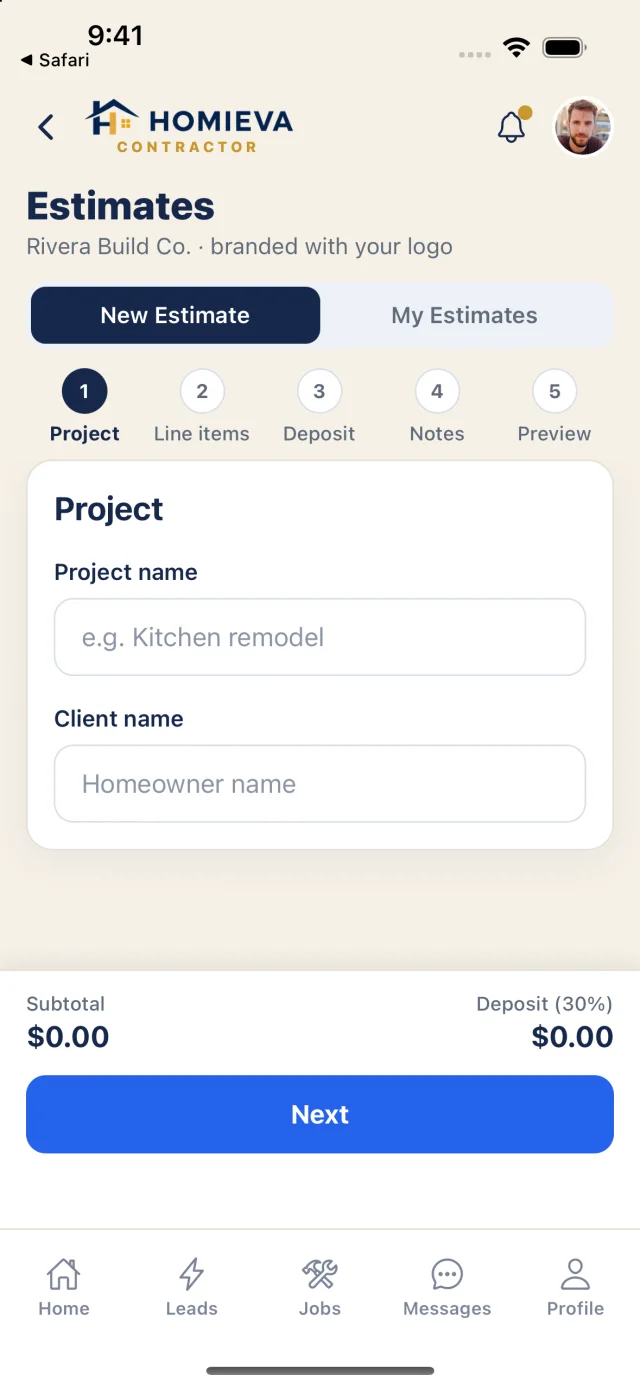
Homieva's estimate tool for contractors follows these same steps: project, line items, deposit, notes and preview, with your logo on it. It can draft line items from the scope, and you edit every number before anything goes out. Lines can be marked as allowances, you can see when the customer has viewed the estimate, and an approved estimate moves on to a contract both sides sign electronically. You can see what's included for contractors or try the estimate builder in the live demo.